
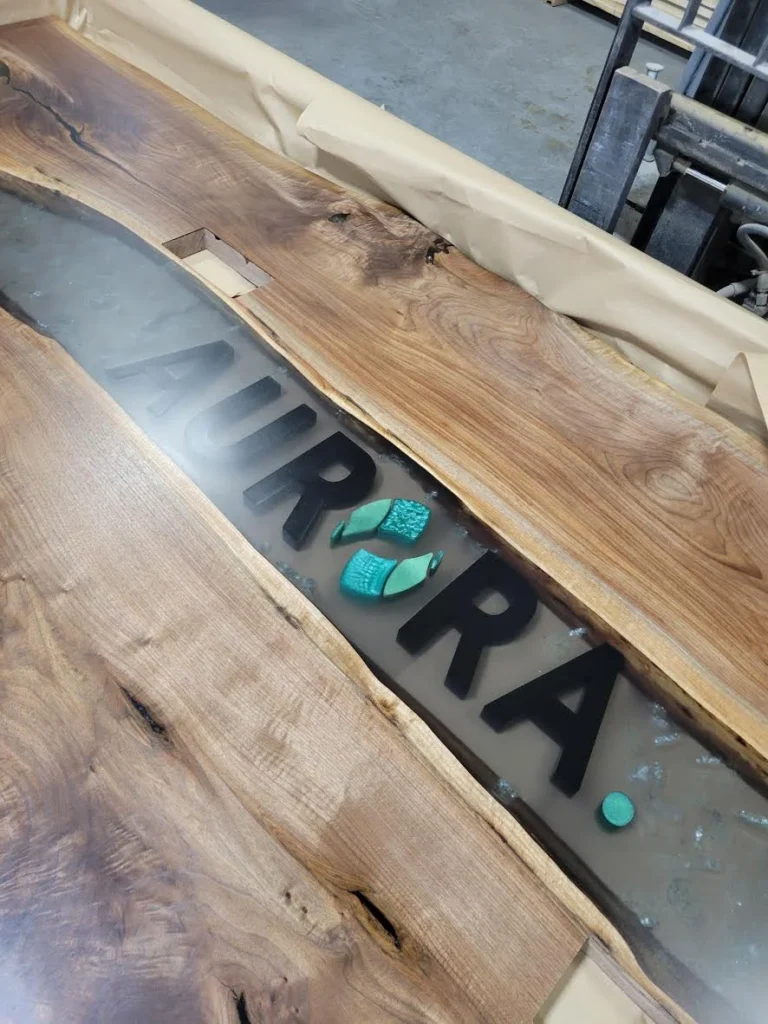
A boardroom table is one of the few pieces of furniture in an office that every client, partner, and new hire sees up close. Integrating your company logo into the table itself turns that everyday piece of furniture into a quiet but effective statement — a permanent part of the room rather than a sign on the wall.
It’s a popular request, but not every logo integration method looks or holds up the same way. Here’s what’s actually involved.
Why Businesses Do This
A logo on the wall is easy to overlook. A logo built into the surface everyone sits around during every meeting is not. It’s a subtle way to reinforce brand identity in a space that’s already meant to represent the company at its best — and unlike a sign or plaque, it becomes a permanent, tactile part of a piece of furniture that’s meant to last decades.
The Main Ways to Integrate a Logo
Wood inlay. The logo is built from individual pieces of contrasting wood species, fitted directly into the tabletop. This is the most traditional and highest-end approach — it reads as genuinely part of the wood, not applied to it, and ages the same way the rest of the table does. It works best for simpler, bolder logo shapes, since intricate detail can be difficult to translate into individual wood pieces.
CNC engraving with resin fill. The logo is precisely carved into the wood surface using CNC routing, then filled with tinted epoxy resin — the same material used in epoxy river tables. This method handles fine detail and multiple colors well, and pairs naturally with a table that already has an epoxy feature, since it’s the same process and finish. This is generally our preferred approach for tables that already include an epoxy river design, since the logo can echo the same resin colors used elsewhere in the top.
Printed or overlay logos. The logo is printed onto a durable laminate or vinyl material and applied to the surface. This is the fastest and most affordable option, and it handles complex, multi-color logos with photographic-level detail — but it sits on top of the wood rather than being part of it, and over years of heavy use it’s more prone to wear at the edges than an inlay or engraved-and-filled logo.
Choosing the Right Method for Your Logo
The right approach usually comes down to your logo’s design:
- Simple, bold shapes (a single icon or wordmark with clean lines) work well as a wood inlay — the classic, most durable option.
- Detailed or multi-color logos are usually better suited to CNC engraving with resin fill, which can capture fine lines and color separation that inlay work can’t.
- Complex, photographic, or gradient-heavy logos may only be achievable with a printed overlay, since neither inlay nor engraving can reproduce that level of detail in solid materials.
Placement Matters as Much as Method
Where the logo sits on the table is worth thinking through as carefully as the design itself. Centered at one end of the table reads as a formal, head-of-table statement — common for boardrooms with a clear hierarchy. Centered along the middle of the table keeps it visible to everyone seated around it, which works well for round or square tables used for more collaborative meetings. For tables with an epoxy river feature, the logo is often positioned within one of the solid wood sections rather than interrupting the resin pour, so the two design elements complement each other instead of competing.
What to Prepare Before You Order
A few things make the process smoother on both ends:
- A vector file of your logo (AI, EPS, or SVG) rather than a photo or low-resolution image — this is essential for CNC engraving and inlay work, since the file needs to translate into precise cut paths.
- Your brand colors, if you want the logo color-matched in resin fill or paint.
- A sense of placement — table center, head of table, or a specific spot — though your builder can usually advise on what will look best for your table’s shape and size.
Getting It Right
A logo integrated into a boardroom table should read as a natural part of the design, not something bolted on as an afterthought. The best results come from planning it in from the start, alongside wood species, shape, and any other features like epoxy or power ports — rather than trying to add it once the table design is already finalized.
If you’re planning a table with an integrated logo, see examples of logo integration on our features page, or get a free quote to start the conversation about what will work best for your logo and space.