
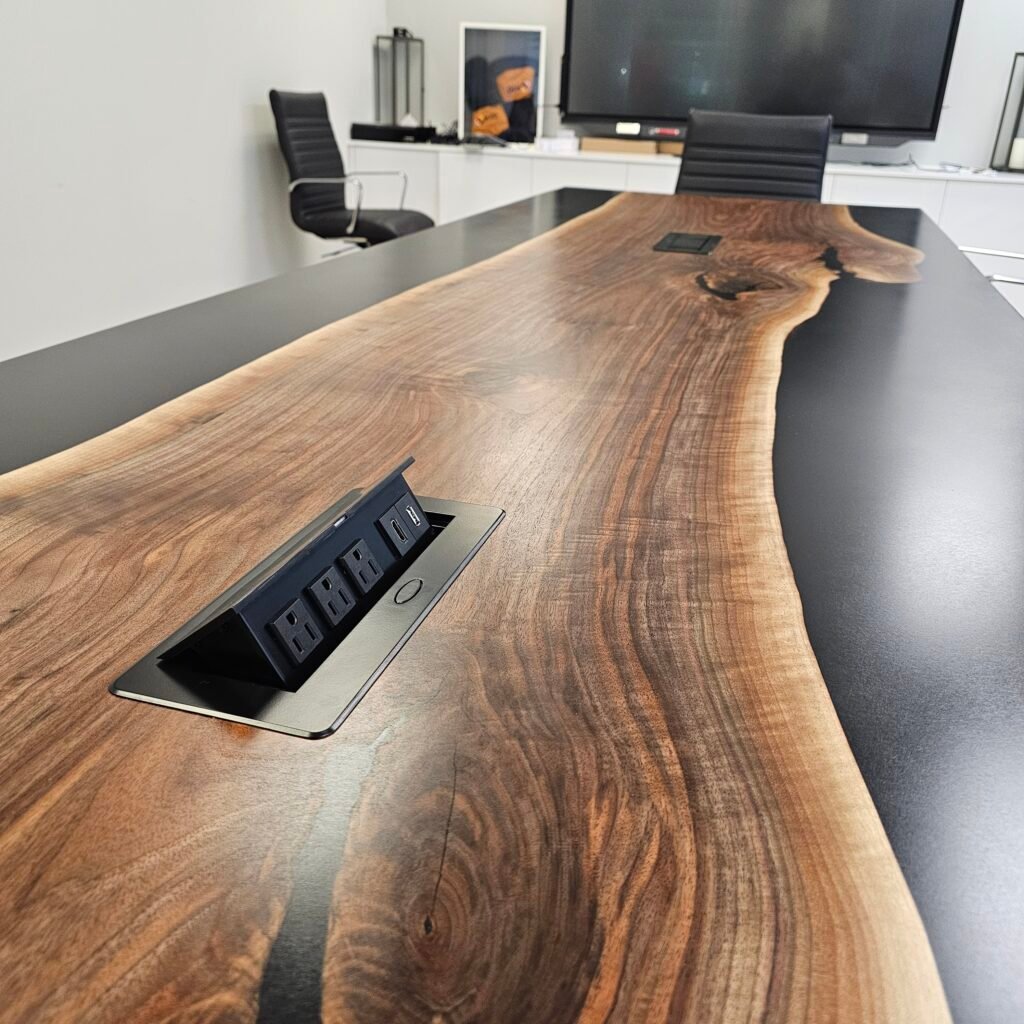
Walk into most boardrooms and you’ll see the same thing: a beautiful table, a tangle of extension cords running to the nearest wall outlet, and someone crawling under the table halfway through a meeting to find power for their laptop. It’s a small thing, but it undercuts the whole point of investing in a custom table in the first place.
Built-in power is one of the most requested features we build into custom boardroom tables — and one of the easiest to get wrong if it’s an afterthought instead of part of the original design. Here’s what actually matters when you’re planning one.
Why Built-In Power Matters More Than It Used To
Meetings today run on devices. Laptops, phones, tablets, presentation remotes — everyone at the table is carrying at least one thing that needs to stay charged for the length of a meeting, and often longer. A boardroom table without integrated power means one of two things happens: people bring their own charging cables and power strips (cluttered, unprofessional, and a tripping hazard), or they simply don’t charge anything and hope their battery holds out.
For a room that’s meant to represent your organization at its most polished, neither is a great look. Built-in power ports solve this quietly — no visible hardware, no cords across the floor, just power exactly where people need it.
Types of Power Ports Available
Not every table needs the same kind of port, and the right choice usually comes down to how formal the room is and how it’s used day to day.
Round or square flush-mount ports sit level with the table surface and stay visible at all times. These work well for boardrooms that host back-to-back meetings, since there’s no popping up or down required — people just plug in.
Pop-up ports stay completely hidden until needed, rising out of the table surface with a light press and retracting flush when not in use. These are a popular choice for more formal executive tables, where a clean, uninterrupted surface matters when the room isn’t in use.
Side-mounted or under-lip ports keep the top of the table completely clear and place the ports along the underside edge — a good option if the aesthetic priority is an unbroken wood or epoxy surface with no visible hardware at all.
Each style is available in a range of finishes to match your table’s hardware — matte black, brushed steel, or custom colour-matched options.
What’s Actually Inside a Power Port
Most integrated power ports combine a few core connection types in a single unit:
- Standard AC outlets — for laptop chargers and other three-prong devices
- USB-A ports — for older phones, wireless mice, and other legacy devices
- USB-C ports — increasingly the standard for fast-charging modern laptops and phones without a bulky charger
For rooms that also handle presentations or video conferencing, it’s worth discussing HDMI or Ethernet integration at the same time, even if it’s routed to a separate connectivity panel rather than the same port cluster as the power outlets. Bundling this decision in with your table order — rather than retrofitting later — is significantly cleaner and less expensive in the long run.
How Many Ports Do You Actually Need?
A reasonable starting point is one power port for every two to three seats, though this depends heavily on how the room is used. A 12-person boardroom used mainly for internal meetings might get by with four well-placed ports. A client-facing space where every attendee is presenting from a laptop may warrant one per seat.
Placement matters as much as quantity. Ports are typically set a consistent distance in from the table edge, spaced evenly along the length rather than clustered at one end — the goal is that no one has to reach across a neighbour or run a cable the length of the table to charge a device.
Planning the Wiring Before the Table Is Built
This is the step people underestimate. Because a power port has to connect to an actual electrical source, the placement of your table relative to the room’s power supply needs to be worked out before the table is built, not after.
For rooms with floor outlets or a raised access floor, this is usually straightforward — cabling runs up through a leg or base into the table. For rooms without floor power nearby, options include routing conduit under the table to the nearest wall, or working with an electrician to add a floor outlet during the table installation. Either way, this is a conversation worth having with your table builder and an electrician at the same time, before production starts, so the leg or base design can accommodate the wiring path cleanly.
Integrating Power Without Compromising the Design
The reason built-in power is worth doing custom, rather than retrofitting a module into an off-the-shelf table, comes down to fit and finish. A port cut into a table after the fact often looks exactly like what it is — an add-on. Built into the original design, the same feature can sit flush with a solid wood or epoxy river surface, matched to the grain, with routing hidden inside the base rather than taped along the underside.
This is especially true for tables with an epoxy river feature, where a port can be positioned to sit cleanly within the wood sections rather than interrupting the resin pour, or for live-edge tables where placement needs to work around the natural contour of the slab. Getting this right is a design decision made at the start of the build, not a modification made at the end.
Planning a Table with Built-In Power?
Every table we build can be configured with the power port style, count, and placement that fits your room — round, square, pop-up, or side-mounted, in any finish, on any table length or shape.
See all available power port styles →